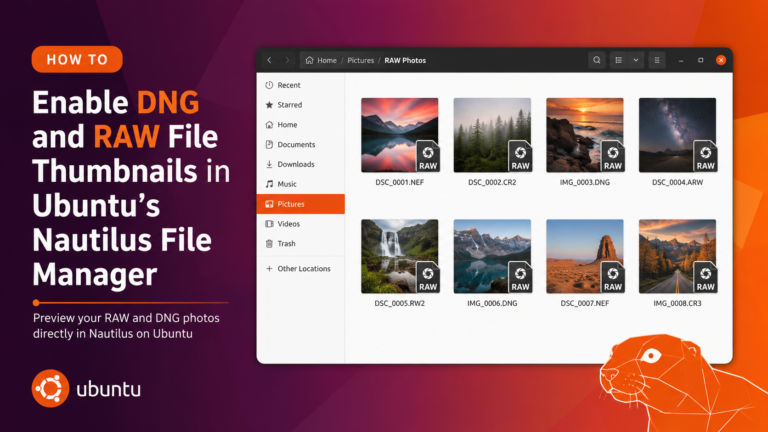
Ubuntu’s Nautilus file manager doesn’t show thumbnails for DNG, CR2, NEF, ARW, or other RAW camera formats out of the box. This guide covers the exact steps to fix that using dcraw and a custom thumbnailer registration.
Why RAW Thumbnails Don’t Work on Ubuntu
The package most guides point to — libopenrawgnome — only installs a shared library. It ships with no .thumbnailer registration file, so Nautilus never learns it can handle RAW formats. The thumbnailer sits unused, and your DNG files show a generic icon no matter how long you wait.
The fix involves three things: a tool that can extract embedded previews from RAW files (dcraw), a small wrapper script that feeds those previews to ImageMagick for resizing, and a .thumbnailer file that tells Nautilus the script exists.
Step 1 — Install the Required Packages
sudo apt install libopenrawgnome7t64 -y
dcraw is available on most Ubuntu installs already. Check with:
This script takes three arguments — input file path, output PNG path, and size — which is exactly the interface Nautilus passes to any registered thumbnailer. dcraw -e -c extracts the embedded JPEG preview that most RAW files carry internally, and convert resizes it to the requested thumbnail dimensions.
This covers DNG (Adobe), CR2/CRW (Canon), NEF (Nikon), ARW (Sony), RAF (Fujifilm), ORF (Olympus), PEF (Pentax), and Panasonic RAW formats in one file.
Step 4 — Clear the Thumbnail Cache and Restart Nautilus
Nautilus caches thumbnail failures. Clear the cache so it retries every file:
rm -rf ~/.cache/thumbnails/
Restart Nautilus:
nautilus -q && nautilus &
Navigate to a folder with DNG or RAW files — thumbnails should start generating within a few seconds.
How It Works
Component
Role
dcraw -e -c
Extracts the embedded JPEG preview from the RAW file
convert (ImageMagick)
Resizes the extracted preview to the requested thumbnail size
/usr/share/thumbnailers/raw.thumbnailer
Tells Nautilus which MIME types this script handles
TryExec
Nautilus checks this path exists before calling the thumbnailer
Most RAW files contain a full-resolution embedded JPEG shot by the camera. dcraw pulls that out directly, so thumbnail generation is fast — no full RAW decode required.
Supported Formats After This Fix
DNG — Adobe Digital Negative (used by Google Pixel, OnePlus, Lightroom exports)
CR2 / CRW — Canon RAW
NEF — Nikon RAW
ARW — Sony RAW
RAF — Fujifilm RAW
ORF — Olympus RAW
PEF — Pentax RAW
Panasonic RAW (RW2)
Troubleshooting
Thumbnails still not showing after restart
Run the script manually on one of your files to confirm it works:
The output should read something like PNG image data, 256 x 192, 8-bit/color RGB. If it does, the toolchain works and Nautilus will pick it up on the next browse.
dcraw: no embedded JPEG error
Some RAW files — particularly very old formats or losslessly-compressed DNGs — don’t carry an embedded preview. For those, dcraw falls back to a full decode. The thumbnail will still generate but may be slower.
Permission denied on /usr/share/thumbnailers/
The sudo in Step 3 is required. If you used a text editor that launched without sudo, recreate the file with:
Why doesn’t Ubuntu show RAW thumbnails by default? The libopenrawgnome package that ships in Ubuntu’s repositories installs only a shared library — it doesn’t include a .thumbnailer registration file. Without that file, Nautilus has no way to know the library supports RAW formats.
Does this work on Ubuntu 22.04, 24.04, and 24.10? Yes. The .thumbnailer file format and dcraw are available across all current Ubuntu LTS and interim releases. The package name for the GNOME integration library differs slightly (libopenrawgnome7t64 on 24.04+, libopenrawgnome7 on 22.04), but the thumbnailer script and registration steps are identical.
Will this slow down Nautilus when browsing large RAW folders? Thumbnail generation runs in the background. Nautilus queues files and processes them one at a time — browsing stays responsive. Generated thumbnails are cached in ~/.cache/thumbnails/, so each file is only processed once.
Does this work with DNG files from smartphones like Google Pixel and OnePlus? Yes. DNG is the format used by Google Pixel, OnePlus, and many third-party camera apps. dcraw handles DNG files from both dedicated cameras and smartphones.
What if I want thumbnails in a KDE file manager like Dolphin instead? Install kdegraphics-thumbnailers — it includes native RAW support for Dolphin and other KDE applications.
Note: Steps above were tested on Ubuntu 24.04 with Nautilus 46 and dcraw 9.28. Package names and exact paths may vary slightly on other Ubuntu versions. Verify commands before running on production systems.
Disclaimer: This post is for informational purposes. Commands involving sudo modify system files — review each step before executing.
DaVinci Resolve 21 introduces a brand-new Photo page, bringing Hollywood’s most advanced color tools to still photography — a serious potential Lightroom alternative for photographers who also edit video.
The plan was simple: fire up Resolve 21 on Ubuntu 25.10 to try the new Photo page alongside the usual video timeline. Reality hit fast. Photos wouldn’t load into the Photo page. Video clips dropped onto the Edit and Color timelines showed black frames. Thumbnails in the Media Pool stayed grey. The Resolve UI looked alive, the splash said “Ready”, but anything that should render a pixel to the viewer just… didn’t.
If you hit this exact scenario — excited to try the new Photo page on a hybrid-GPU Linux laptop and finding that neither photos nor videos will load in the viewer, with Failed to register OpenGL object for CUDA interop: cudaErrorUnknown filling the Resolve debug log — this post is for you. Root cause: a hybrid-GPU buffer mismatch between Xwayland’s OpenGL context (running on the iGPU) and the CUDA context (running on the NVIDIA dGPU). Once that was fixed, a separate issue showed up on DJI drone MP4s: Failed to decode the audio samples — the known H.264/AAC licensing gap on DaVinci Resolve Free for Linux. Both problems have clean fixes. This post documents the error signatures and the exact commands that cleared each one.
Resolve launches, reaches the “Ready” state, and the UI looks normal. But the moment a clip or a still image is placed on the timeline, the source viewer and record viewer stay black. The Color page loads (splash passes through it), but thumbnails don’t render. In ~/.local/share/DaVinciResolve/logs/ResolveDebug.txt, the same error repeats hundreds of times per second:
DVIP | ERROR | Failed to register OpenGL object for CUDA interop: cudaErrorUnknown.
Why It Happens
Resolve’s Display/Viewer pipeline uses a CUDA-OpenGL interop handshake: it allocates textures in an OpenGL context, then registers them with the CUDA runtime so the GPU-side color and image processing can read/write them without copying through system RAM. This handshake only works when the OpenGL context and the CUDA context live on the same physical GPU.
On a PRIME on-demand hybrid laptop, the default behavior is:
OpenGL context → created on the iGPU / Mesa / Xwayland’s rendering pipeline (whatever the compositor picks, often the integrated GPU to save power).
CUDA context → always on the NVIDIA dGPU (there’s nowhere else for CUDA to run).
When Resolve then tries cudaGraphicsGLRegisterImage() on a texture that was allocated on the AMD iGPU, CUDA can’t pin that memory because it belongs to a different device. The call returns cudaErrorUnknown and the interop layer silently falls through — no pixel ever reaches the viewer.
Fix — Force the Whole Process Onto the NVIDIA GPU
The NVIDIA driver exposes three environment variables that tell GLX and Vulkan to use the NVIDIA GPU instead of whatever the compositor picked. Setting all three before launching Resolve forces OpenGL onto the same device that CUDA already uses, so the interop registration succeeds.
Before the fix: thousands of Failed to register OpenGL object for CUDA interop lines per session. After the fix: 0.
Photos now show in the Media Pool and viewers. Video timelines render frames. The Color page scopes (waveform, vectorscope, parade) populate instead of staying blank.
Why Launching From the GNOME App Icon Still Shows the Error
A common follow-up: the terminal launch works, but clicking the DaVinci Resolve tile in the GNOME app grid brings the CUDA interop errors right back. This is because the GNOME launcher executes the .desktop file’s Exec= line verbatim and does not inherit environment variables from your shell. So the icon still launches plain /opt/resolve/bin/resolve with no NVIDIA offload — OpenGL falls back to the iGPU and the interop error spam returns.
Make the Fix Permanent — Use a Wrapper Script, Not an Inline env= in the .desktop File
The tempting shortcut here is to edit the Exec= line in /usr/share/applications/com.blackmagicdesign.resolve.desktop to prepend the env vars inline, like this:
This looks right but breaks in practice. When GNOME, gtk-launch, or gio launch parse that Exec line, some handlers mis-quote the arguments and Resolve ends up receiving %u (or a stray token from the env block) as a literal argv, which it interprets as a config file path. Result: an instant assertion-failure crash before the window even appears:
Failed to load config file "%u".
AppConfig.cpp:271: void AppConfig::LoadAllSiteInfo(): Assertion `m_SiteEnabledIdx > 0' failed.
Signal Number = 6
The robust fix is a one-file wrapper script at /usr/local/bin/ that sets the env vars itself and execs Resolve with proper argv passing. The entire setup — creating the wrapper, making it executable, patching the .desktop launcher, and refreshing GNOME’s database — fits in a single copy-paste block. Open a terminal (Ctrl+Alt+T) and paste this whole block at once:
Enter your password when prompted. The command runs everything inside one sudo bash -c so there’s only one sudo password prompt and no risk of a missed step.
exec replaces the shell with Resolve — no extra shell process lingers in memory.
"$@" preserves quoting, so if GNOME passes a .resolveproj file through %u, Resolve receives it as a proper single argv. If %u expands to nothing, no stray argv is added.
Env vars are set inside the script, not in the .desktop Exec line, so no launcher quirk can eat them.
From the next GNOME refresh (log out and back in, or run killall -HUP gnome-shell on Xorg / press Alt+F2 → r → Enter on X11 sessions), clicking the DaVinci Resolve tile in the app grid launches the process on the NVIDIA GPU with no CUDA interop errors, identical to the terminal launch.
A Resolve reinstall or point-release update may overwrite com.blackmagicdesign.resolve.desktop — if the interop errors reappear after a Resolve upgrade, paste the block above again. The /usr/local/bin/davinci-resolve-nvidia wrapper sits outside Resolve’s install tree and survives Resolve upgrades untouched, so only the sed portion is re-applying work on updates.
Issue 2: Some MP4 Clip Won’t Play — “Failed to Decode the Audio Samples”
Symptom
With the GPU issue fixed and clips loading correctly, some specific Video files still refused to play cleanly:
IO.Audio | ERROR | Failed to decode clip </home/mac/Videos/DJI_0653.MP4>, track: 0, position: 7712000 - Failed to decode the audio samples.
The error repeats on every timeline scrub. Depending on the file, the video portion may also show as unsupported.
Why It Happens
This is not a bug — it’s Blackmagic’s licensing policy on the Linux build of DaVinci Resolve Free. The free version on Linux ships without the H.264 and AAC decoder licenses, so any clip that uses those codecs in an MP4 or MOV container fails to decode. The paid DaVinci Resolve Studio and the Windows/macOS builds of Free all include these codecs because the licenses are paid for differently on those platforms.
Both the video codec (H.264) and the audio codec (AAC) fall under the restricted set.
Two Ways Forward
Upgrade to DaVinci Resolve Studio (one-time paid license). H.264, H.265 and AAC decode become available natively.
Transcode the source to a Resolve-native intermediate codec using ffmpeg. This is the free route. DNxHR in a MOV container with uncompressed PCM audio is the standard choice — Resolve has always supported it, even on the free Linux build.
Use the DNxHR HQ profile — resolution-independent, visually lossless at 8-bit, broadly supported.
-pix_fmt yuv422p
DNxHR requires 4:2:2 chroma subsampling.
-c:a pcm_s16le
Uncompressed 16-bit signed little-endian PCM audio — no AAC anywhere in the file.
Other valid profile choices if size or bit-depth matters:
dnxhr_sq — smaller file, still very high quality, 8-bit.
dnxhr_hqx — 10-bit, use when the source is 10-bit or when grading wide-gamut material.
dnxhr_444 — 10-bit 4:4:4, highest quality, large files.
Size Expectations
DNxHR is an intermediate codec, not a delivery codec, so file sizes are an order of magnitude larger than H.264. The 3-minute 2.7K DJI clip transcoded to dnxhr_hq produced a ~10.6 GB .mov vs. a ~400 MB original MP4. This is normal and the trade Blackmagic expects — you’d deliver from Resolve back to H.264 at export time.
Verify
Probe the transcoded file to confirm the codecs are Resolve-friendly:
Drop the .mov into the Resolve Media Pool — it plays immediately with audio, no decode errors in the log.
Batch Transcode a Whole Folder
For a shoot with many clips, loop over the folder:
cd /path/to/clips
for f in *.MP4; do
ffmpeg -i "$f" \
-c:v dnxhd -profile:v dnxhr_hq -pix_fmt yuv422p \
-c:a pcm_s16le \
"${f%.MP4}_resolve.mov"
done
Combined Outcome
With both fixes in place:
~/.local/share/DaVinciResolve/logs/ResolveDebug.txt shows zero CUDA interop errors.
The Color page, photos, and viewer thumbnails all render correctly.
DNxHR-transcoded clips play with audio and no decode errors.
Resolve remains stable through full project edits.
FAQ / Common Questions
Why do photos and video clips show as black in Resolve on my Optimus/PRIME laptop? Because the OpenGL context is being created on the integrated GPU while Resolve’s CUDA pipeline runs on the NVIDIA GPU. The interop handshake between those two APIs only works when both live on the same physical device. Launching with __NV_PRIME_RENDER_OFFLOAD=1 __GLX_VENDOR_LIBRARY_NAME=nvidia __VK_LAYER_NV_optimus=NVIDIA_only forces the OpenGL side onto the NVIDIA GPU and clears the cudaErrorUnknown spam.
Is the cudaErrorUnknown interop error a driver bug? It isn’t. It’s the expected result when CUDA is asked to register an OpenGL texture that lives on a different GPU. The NVIDIA driver has no cross-vendor memory import path here, so the error is correct — the fix is to put the OpenGL context on the same device as CUDA.
Why does Resolve Free on Linux refuse to decode H.264 and AAC when VLC and mpv play the same file fine? VLC and mpv ship with LGPL decoders (libavcodec, FFmpeg). Blackmagic can’t redistribute H.264 and AAC decoders inside the free Linux build of Resolve because the MPEG-LA and Fraunhofer licenses require per-copy royalties that Blackmagic pays only for Studio and for the platforms where the OS vendor pre-licenses these codecs. It’s a commercial-licensing limitation, not a technical one.
Does DaVinci Resolve Studio lift the H.264/AAC restriction on Linux? Yes. Studio includes the licensed H.264, H.265, and AAC decoders on Linux, plus H.264/H.265 encoding for the Deliver page.
Why DNxHR HQ specifically? Would ProRes work? DNxHR HQ is visually lossless at 8-bit, broadly supported by Resolve on all platforms, and ffmpeg bundles an open encoder for it. ProRes also works — -c:v prores_ks -profile:v 3 produces ProRes HQ — but ProRes 422 HQ files are slightly larger and the encoder’s tuning varies between FFmpeg versions. DNxHR is the safer default on Linux.
Will this GPU fix survive a driver or kernel update? The env vars are not tied to a driver version or kernel, so they continue to work across upgrades. If a future NVIDIA driver changes the variable names or adds a new one, you’d update the .desktopExec= line accordingly. Switching between PRIME on-demand and PRIME performance modes also doesn’t change the answer — the env vars always pin the process to NVIDIA.
Can I use this same env-var trick for other apps that fail on hybrid GPUs? Yes. Any CUDA app that draws through OpenGL (Blender, Houdini, Natron, OBS with NVENC + OpenGL capture, certain ML notebooks that visualize tensors through GL textures) can hit the same interop wall. Prefixing the launch command with those three env vars is a general fix for the pattern.
Note: Behavior reported here is from a single hybrid laptop on Ubuntu 25.10 with the NVIDIA 580 proprietary driver and DaVinci Resolve 21.0b1 Linux Beta. Other driver branches and Resolve releases may differ in edge cases. The env-var approach remains correct for any NVIDIA driver that supports PRIME offload, which is all 435-series and newer.
Disclaimer: DaVinci Resolve 21.0b1 is a public beta from Blackmagic Design. Use on production systems at your discretion. H.264 and AAC decoding limitations on Linux are a property of the Resolve Free edition only and are expected behavior, not a malfunction.
Installing DaVinci Resolve 21.0b1 on Ubuntu 25.10 (Questing) runs into two blockers out of the box: the installer rejects the system because of “missing” APR, ALSA and GLib packages, and after install the binary refuses to launch with a g_once_init_leave_pointer symbol lookup error in libpango-1.0.so.0. Both issues are caused by Ubuntu 25.10’s 64-bit time_t transition and DaVinci Resolve bundling an older GLib. This post walks through the exact fix used on a working system, with the commands copy-paste ready.
System Details
Item
Value
OS
Ubuntu 25.10 (Questing)
Kernel
6.17.0-20-generic
DaVinci Resolve
21.0b1 Linux (public beta)
Installer file
DaVinci_Resolve_21.0b1_Linux.run
Install location
/opt/resolve
Issue 1: Installer Complains About Missing Packages
When launching the .run installer on Ubuntu 25.10, it aborts with:
Error: Missing or outdated system packages detected.
Please install the following missing packages:
libapr1 libaprutil1 libasound2 libglib2.0-0
Use SKIP_PACKAGE_CHECK=1 to bypass the system package check.
Why This Happens
Ubuntu 24.04 and later have transitioned to 64-bit time_t on 32-bit-capable architectures. During the transition, several library packages were renamed with a t64 suffix to signal the new ABI. On Ubuntu 25.10 the legacy names are no longer available in the archive, and the replacements are:
Legacy name (installer asks for)
Ubuntu 25.10 package (actually installable)
libapr1
libapr1t64
libaprutil1
libaprutil1t64
libasound2
libasound2t64
libglib2.0-0
libglib2.0-0t64
A plain apt install libasound2 fails with Package 'libasound2' has no installation candidate because it is now a virtual package provided by libasound2t64.
On a fresh Ubuntu 25.10 desktop install, libasound2t64 and libglib2.0-0t64 are usually already present as dependencies of the desktop stack. libapr1t64 and libaprutil1t64 typically need to be pulled in.
Run the Installer With the Package Check Skipped
Because the installer still looks for the legacy package names, pass SKIP_PACKAGE_CHECK=1 to bypass its check (the actual runtime dependencies are satisfied by the t64 packages — ABI-compatible).
cd ~/Downloads/DaVinci_Resolve_21.0b1_Linux
chmod +x DaVinci_Resolve_21.0b1_Linux.run
sudo SKIP_PACKAGE_CHECK=1 ./DaVinci_Resolve_21.0b1_Linux.run -i -y -a
Flag breakdown:
-i — install without GUI (text-mode install, useful over SSH or when zenity/dbus isn’t available)
-y — skip confirmation prompts
-a — --allowroot; the installer refuses to run as root by default and exits with “The DaVinci Resolve installer is not intended to be run as the root user”, so this flag is required when invoking with sudo
On success the installer copies files to /opt/resolve, drops a desktop entry, installs udev rules for Blackmagic panels, creates /var/BlackmagicDesign/DaVinci Resolve, and ends with:
DaVinci Resolve installed to /opt/resolve
Done
Issue 2: Launch Error – undefined symbol g_once_init_leave_pointer
With install complete, running the binary fails immediately:
$ /opt/resolve/bin/resolve
/opt/resolve/bin/resolve: symbol lookup error: /lib/x86_64-linux-gnu/libpango-1.0.so.0: undefined symbol: g_once_init_leave_pointer
Why This Happens
DaVinci Resolve 21.0b1 ships with its own bundled copy of GLib 2.68.4 inside /opt/resolve/libs/:
Because the resolve binary is launched with a wrapper that prepends /opt/resolve/libs to the dynamic linker search path, these bundled libraries take precedence over the system’s GLib. Meanwhile, the system’s libpango (linked against Ubuntu 25.10’s GLib 2.86) expects the symbol g_once_init_leave_pointer, which was only added in GLib 2.80. GLib 2.68 does not export it, so when libpango tries to resolve the symbol against the bundled (older) libglib, the loader fails.
In short: two components that must agree on GLib version are disagreeing — system libpango wants GLib ≥ 2.80, Resolve ships GLib 2.68.
Fix: Move the Bundled GLib Libraries Aside
The safe fix is to move (not delete) the bundled GLib family out of /opt/resolve/libs/ so the dynamic linker falls through to the system copies, which libpango is already happy with.
Keeping them under disabled_libs/ inside the same tree means they can be restored quickly if a future Resolve update expects them back, without redownloading the 3GB+ installer.
Launch Resolve
/opt/resolve/bin/resolve
On first run the DaVinci_Resolve_Welcome onboarding window opens, which confirms both the installer and the GLib fix are working. From the second launch onwards, the main editor UI comes up directly.
One-Shot Script (All Steps Combined)
For convenience, here is the full sequence in one block. Run it from the folder containing DaVinci_Resolve_21.0b1_Linux.run:
# 1. Install the t64 dependency variants
sudo apt update
sudo apt install -y libapr1t64 libaprutil1t64 libasound2t64 libglib2.0-0t64
# 2. Run the installer, bypassing the legacy package name check
chmod +x DaVinci_Resolve_21.0b1_Linux.run
sudo SKIP_PACKAGE_CHECK=1 ./DaVinci_Resolve_21.0b1_Linux.run -i -y -a
# 3. Move the bundled (older) GLib family out of the way
sudo mkdir -p /opt/resolve/libs/disabled_libs
sudo mv /opt/resolve/libs/libglib-2.0.so* /opt/resolve/libs/disabled_libs/
sudo mv /opt/resolve/libs/libgio-2.0.so* /opt/resolve/libs/disabled_libs/
sudo mv /opt/resolve/libs/libgmodule-2.0.so* /opt/resolve/libs/disabled_libs/
sudo mv /opt/resolve/libs/libgobject-2.0.so* /opt/resolve/libs/disabled_libs/
# 4. Launch
/opt/resolve/bin/resolve
Verification
Check that the system GLib is now being picked up by Resolve:
Each line should point to /lib/x86_64-linux-gnu/ rather than /opt/resolve/libs/. If any of them still resolve to /opt/resolve/libs/, re-check that the move step captured all SONAME symlinks (.so, .so.0, .so.0.6800.4).
Confirm the system GLib version meets the 2.80 threshold:
dpkg -s libglib2.0-0t64 | grep Version
On Ubuntu 25.10 this returns Version: 2.86.0-2ubuntu0.3, which is well above the 2.80 requirement and includes g_once_init_leave_pointer.
Running on a hybrid NVIDIA + Intel/AMD laptop? Once Resolve launches, you may hit a second class of problems: photos not loading in the new Photo page, video clips showing black frames in the Edit and Color timelines, and Failed to register OpenGL object for CUDA interop: cudaErrorUnknown spamming the log. That’s a separate hybrid-GPU issue with its own fix (plus a DNxHR workaround for the H.264/AAC decode limit on Resolve Free Linux), documented in the follow-up post: DaVinci Resolve 21 Photos Not Loading and Videos Showing Black on Ubuntu – Hybrid NVIDIA GPU Fix + H.264/AAC Codec Workaround.
FAQ / Common Questions
Why does DaVinci Resolve 21.0b1 ask for libasound2 when Ubuntu 25.10 only has libasound2t64? Ubuntu transitioned 32-bit-capable architectures to 64-bit time_t, renaming affected library packages with a t64 suffix. The installer’s hard-coded package check predates this transition and still looks for the legacy names. The t64 variants provide the same SONAMEs at runtime, so the actual library linkage works fine once installed.
Is it safe to use SKIP_PACKAGE_CHECK=1? On Ubuntu 24.04 and 25.10, yes — only when the t64 equivalents of the listed packages are already installed. The flag disables the installer’s name-based check, not any runtime safety. If a library is genuinely missing the app will fail to launch with a clearer error pointing to the missing SONAME.
Why can’t I just upgrade the bundled GLib inside /opt/resolve/libs/? Replacing only a few files inside Resolve’s bundled libraries risks breaking Resolve’s own Qt and Fusion libraries that were built against GLib 2.68. Moving the bundled copies aside and letting the system’s 2.86 take over is cleaner because the system libraries are already binary-compatible with everything else on the machine.
Will a DaVinci Resolve update restore the broken GLib files? A reinstall of the same version will. If a future 21.x update rewrites /opt/resolve/libs/, repeat step 3 (move the four GLib family files into disabled_libs/). The disabled_libs/ folder itself is ignored by the installer.
Does this fix apply to DaVinci Resolve 20 or 19? The missing-packages part of the fix (installing t64 variants) applies to any Resolve version on Ubuntu 24.04+. The GLib fix applies specifically to versions that bundle GLib older than 2.80, which includes Resolve 21.0b1 and several 20.x releases.
Where is DaVinci Resolve installed? At /opt/resolve. The launcher binary is /opt/resolve/bin/resolve, bundled libraries live under /opt/resolve/libs/, and the shared project data directory is /var/BlackmagicDesign/DaVinci Resolve.
Note: Steps above are based on a working install on a single Ubuntu 25.10 system with kernel 6.17.0-20. Package versions and Resolve’s bundled library set may change in future updates. Verify file names under /opt/resolve/libs/ match what is being moved before running the mv commands on a different version.
Disclaimer: DaVinci Resolve 21.0b1 is a public beta from Blackmagic Design. Use on production systems at your own discretion. Always back up project files before upgrading.
[ Dec 2025 Update ] If you’re running an AMD Ryzen laptop on Linux ( Ubuntu ) and noticed your CPU is stuck at base clock speeds after waking from suspend, you’re not alone. This is a known bug with the amd-pstate-epp driver that affects many Ryzen mobile processors.
Background: The BIOS Frequency Cap Problem
Many AMD Ryzen laptops (especially ASUS models) have BIOS-imposed power limits that prevent the CPU from reaching its full boost frequency. The default acpi-cpufreq driver respects these limits, leaving you stuck at lower clocks.
The fix is to use the amd-pstate driver with kernel parameters that bypass these limits:
amd_pstate=active – Use AMD’s modern pstate driver in autonomous mode
processor.ignore_ppc=1 – Ignore BIOS _PPC power performance control limits
acpi_cpufreq.enable_pcc=false – Disable Platform Communication Channel limits
intel_pstate=disable – Prevent Intel driver from loading (AMD system)
After adding these, run sudo update-grub and reboot.
This gets your CPU boosting to full speed on fresh boot. But then comes the suspend bug…
The Problem
After resuming from suspend, my AMD Ryzen 7 4800H was locked at 2.9 GHz instead of boosting to its full 4.3 GHz. The system felt sluggish, and checking the frequencies confirmed the issue:
4.3 GHz boost was completely unavailable after suspend.
Diagnosis
The culprit is the amd-pstate-epp driver running in “active” mode:
$ cat /sys/devices/system/cpu/cpu0/cpufreq/scaling_driver
amd-pstate-epp
$ cat /sys/devices/system/cpu/amd_pstate/status
active
In active mode, the hardware autonomously manages frequency scaling. After suspend, something breaks in this handoff and the driver fails to restore the full frequency range.
What Doesn’t Work
Writing directly to scaling_max_freq – ignored by the driver
Toggling CPU boost off/on
Cycling power profiles
Restarting power-profiles-daemon
Using cpupower commands
The Solution
The fix is surprisingly simple: cycle the amd-pstate mode from active to passive and back:
echo passive | sudo tee /sys/devices/system/cpu/amd_pstate/status
sleep 1
echo active | sudo tee /sys/devices/system/cpu/amd_pstate/status
This forces the driver to reinitialize and properly restore the frequency limits.
Making It Permanent
Create a script that runs automatically after resume:
sudo tee /lib/systemd/system-sleep/cpu-freq-restore << 'EOF'
#!/bin/bash
case $1 in
post)
# Fix amd-pstate-epp bug after resume
/usr/bin/echo passive > /sys/devices/system/cpu/amd_pstate/status 2>/dev/null
/bin/sleep 1
/usr/bin/echo active > /sys/devices/system/cpu/amd_pstate/status 2>/dev/null
# Set performance EPP
for epp in /sys/devices/system/cpu/cpu*/cpufreq/energy_performance_preference; do
/usr/bin/echo performance > "$epp" 2>/dev/null
done
;;
esac
exit 0
EOF
sudo chmod 755 /lib/systemd/system-sleep/cpu-freq-restore
Scripts in /lib/systemd/system-sleep/ are automatically executed by systemd:
On suspend: called with pre argument
On resume: called with post argument
The script runs as root, so no authentication prompts will appear.
Verification
After your next suspend/resume cycle, verify the fix:
# Check max frequency is restored
$ cat /sys/devices/system/cpu/cpu0/cpufreq/scaling_max_freq
4300902
# Check actual frequencies (should see boost clocks under load)
$ grep "MHz" /proc/cpuinfo | head -4
cpu MHz : 4290.553
cpu MHz : 4270.657
cpu MHz : 4290.130
cpu MHz : 1113.175
Why This Happens
The amd-pstate-epp driver in “active” mode relies on the CPU’s internal firmware (CPPC – Collaborative Processor Performance Control) to manage frequencies. During suspend, the CPU state is saved, but on resume, the CPPC negotiation between the OS and firmware doesn’t properly restore the upper frequency limits.
Cycling through “passive” mode forces a complete reinitialization of the driver’s frequency tables, which correctly queries the hardware capabilities again.
Affected Systems
This bug appears to affect:
AMD Ryzen 4000/5000/6000/7000 series mobile processors
Linux kernels with amd-pstate-epp driver (5.17+)
Systems using amd_pstate=active kernel parameter
ASUS laptops with restrictive BIOS power limits (ROG, TUF, Zephyrus series)
The Full Picture
If you have an AMD Ryzen laptop that won’t boost properly, you likely need both fixes:
Kernel parameters (in /etc/default/grub) – to bypass BIOS limits on boot
Resume script (in /lib/systemd/system-sleep/) – to restore frequencies after suspend
Without the kernel parameters, you’re stuck at base clock all the time. Without the resume script, you lose boost after every suspend cycle.
Alternative: Use Passive Mode Permanently
If you prefer, you can run in passive mode permanently by adding to your kernel parameters:
amd_pstate=passive
In passive mode, the OS has more direct control over frequency scaling, and the suspend bug doesn’t occur. However, active mode generally provides better power efficiency when working correctly.
Tested on ASUS TUF Gaming A17 (FA706IC) with AMD Ryzen 7 4800H, running Ubuntu 25.10 and kernel 6.18.1
After updating Ubuntu to the latest version ( Ubuntu 25.10 | October 2025), the GDM (GNOME Display Manager) login screen completely stopped loading. The system would boot normally but never display the graphical login interface.
System Configuration
OS: Ubuntu 25.10 (updated October 2025)
Kernel: Linux 6.14.0-32-generic
GPU Setup: Dual GPU system – NVIDIA GeForce RTX 3050 Mobile (Driver 580.95.05) | AMD Radeon Vega (integrated)
Display Manager: GDM3
Desktop Environment: GNOME 49
Initial Symptoms
When attempting to access the GUI:
Black screen with no login prompt
GDM service appeared to be running (systemctl status gdm showed “active”)
Could access system via TTY (Ctrl+Alt+F2)
No obvious error messages in initial logs
Investigation Process
Step 1: Check GDM Service Status
sudo systemctl status gdm3
Finding: GDM was active but logs showed repeated failures:
Gdm: GdmDisplay: Session never registered, failing
Gdm: GdmLocalDisplayFactory: maximum number of X display failures reached: check X server log for errors
The greeter was launching but immediately crashing in a loop.
System Wayland libraries: 1.24.0 (correct, up-to-date)
AMD GPU Wayland libraries: 1.23.0 (outdated, from /opt/amdgpu/lib/)
GNOME Shell: 49.0
Mutter: 49.0 (libmutter-17)
The October 2025 Ubuntu 25.04 update upgraded GNOME/Mutter to version 49 (Mutter 17), which requires Wayland 1.24.0 with the wl_fixes_interface symbol. The old AMD 1.23.0 libraries don’t have this symbol.
My 5TB Seagate external drive—the one with literally years of backups— all of a sudden decided to play hide and seek with Ubuntu Linux. Windows? No problem, worked like a charm. Ubuntu? Complete radio silence.
If you’re reading this, you’re probably in the same boat. Good news: I cracked it, and it’s actually a pretty interesting problem once you dig into it.
What Went Wrong
Picture this: You plug in your external drive, hear that satisfying USB connection sound, but then… nothing. No pop-up, no drive in the file manager, nada. That was me last Sunday.
The weird part? The drive was perfectly fine. Windows could read it, write to it, everything. But Ubuntu Linux acted like it didn’t exist. Classic Linux moment, right? Wrong. Turns out, there’s actual logic behind this madness.
Let’s Get Our Hands Dirty
The first thing I did was fire up the terminal. Yeah, I know, GUI would be nice, but sometimes you gotta go old school. Here’s how the investigation went down:
Round 1: Where’s My Drive?
lsblk -f
Ran this bad boy expecting to see my drive. Got everything BUT my external drive. Internal NVMe? Check. Every snap loop known to mankind? Check. My 5TB lifesaver? MIA.
Round 2: Okay, But Is It Even Connected?
lsusb
Boom! There it was:
Bus 004 Device 002: ID 0bc2:ab8c Seagate RSS LLC One Touch w/PW
So Ubuntu could SEE the drive, it just didn’t know what to do with it. Like when you meet someone at a party and forget their name immediately—awkward, but fixable.
Round 3: What’s the Kernel Saying?
sudo dmesg | grep -i "seagate"
Kernel was like “Yeah, I see it, but ¯_(ツ)_/¯”. No errors, no warnings, just… nothing. That’s when I knew something deeper was going on.
The “Aha!” Moment
This is where things got interesting. I decided to dig deeper into the USB device info:
See that Driver=(none) part? That’s the problem right there. Ubuntu knew it was a storage device, but had absolutely no clue which driver to use. It’s like having a Ferrari but no keys.
Why This Drama?
Here’s the thing most people don’t know: modern big-boy drives (we’re talking 4TB+ territory) don’t use the old USB storage protocol anymore. They’ve moved on to something called UAS—USB Attached SCSI.
Think of it this way:
Old USB storage = Taking the stairs one at a time
UAS = Taking the elevator
UAS is faster, smarter, and doesn’t hog your CPU like the old protocol. But here’s the kicker—Ubuntu doesn’t always load the UAS driver automatically. Why? Who knows. Linux gonna Linux.
The Fix That Actually Works
Alright, enough theory. Here’s how I got my drive back from the dead:
Step 1: Wake Up the UAS Driver
sudo modprobe uas
This basically tells Ubuntu, “Hey, remember that fancy USB driver you forgot about? Yeah, load it up.”
Step 2: Introduce Your Drive to the Driver
echo '0bc2 ab8c' | sudo tee /sys/bus/usb/drivers/uas/new_id
Translation: “Dear UAS driver, meet Seagate. Seagate, meet UAS. You two are going to be best friends.”
Step 3: Give the USB a Little Kick
sudo usbreset 0bc2:ab8c
Sometimes you just need to turn it off and on again. But fancy-like, through the terminal.
Step 4: Did It Work?
lsblk -f | grep -v loop
And just like that, my drive showed up at /media/mac/One Touch. Magic? Nope. Just Linux being Linux.
But Why Does This Even Happen?
Look, I’ve been using Linux for years, and stuff like this still catches me off guard. Here’s the deal:
It’s not a bug, it’s a… well, okay, it’s kind of a bug. But also:
Drive manufacturers don’t always follow standards
Linux plays it safe—if it’s not sure, it won’t load a driver
Windows has deals with manufacturers; Linux developers reverse-engineer everything
Your specific drive model might be too new or too weird for the default config
Make This Fix Stick (So You Don’t Have to Do This Again)
I’m lazy. I don’t want to run these commands every time I plug in my drive. Here’s how to make Ubuntu remember:
sudo nano /etc/udev/rules.d/99-seagate-uas.rules
Paste this line (yeah, it’s long and ugly, but it works):
Done. Your drive will now work every time you plug it in. You’re welcome.
Pro Tips from Someone Who’s Been There
After spending way too many late nights fighting with external drives, here’s what I’ve learned:
The USB Port Matters Not all USB ports are created equal. That blue USB 3.0 port? Use it. The ancient USB 2.0 on the side? That’s for your mouse. Big drives need big bandwidth.
Cable Quality Is Real That sketchy cable you got for ₹50 / $5 at the station? Yeah, throw it away. Get a decent cable. Your data deserves better.
Format Wars Are Stupid (But Real)
exFAT: The Switzerland of file systems. Works everywhere, handles big files
NTFS: Windows’ favorite child. Linux can read it, but you might need ntfs-3g
ext4: Linux native. Windows will pretend it doesn’t exist
When All Else Fails Sometimes the drive is just having a bad day. Try:
Different USB port (seriously, this fixes 30% of problems)
Different cable (another 20%)
Restart (yes, even on Linux)
Different computer (to check if it’s the drive or your system)
The Quick and Dirty Checklist
Having issues? Run through this:
Can you see it? → lsusb
Is there a driver? → sudo usb-devices | grep Driver
Load UAS → sudo modprobe uas
Tell UAS about your drive → echo 'vendor_id product_id' | sudo tee /sys/bus/usb/drivers/uas/new_id
Reset USB → sudo usbreset vendor_id:product_id
Check again → lsblk
If that doesn’t work, the problem is probably:
Dead drive (RIP) – My backup of the backup – a 4TB is in this state. I can hear the drive spinning up and then .. it just dies.
Dead cable (easy fix)
Dead USB port (try another)
Filesystem corruption (time for fsck)
What I Learned
This whole adventure taught me something: Linux isn’t trying to be difficult. It’s just really, really careful. Windows will load any driver and hope for the best. Linux wants to be absolutely sure before it touches your hardware.
Is it annoying? Sure. But it’s also why Linux servers run for years without crashing. It’s the price we pay for stability.
Plus, once you fix it, you feel like a wizard. And that’s worth something.
Your Turn
Got a similar story? Fixed it differently? Think I’m doing it wrong? Drop a comment. The best part about the Linux community is we all learn from each other’s pain… I mean, experiences.
And hey, if this saved your bacon, share it. There’s someone out there right now, at 2 AM, googling “external drive not showing ubuntu help please god why” who needs this.
The Commands You’ll Actually Use
Save this somewhere. You’ll need it again:
# See what's connected
lsusb
# Get details
sudo usb-devices | grep -A 5 -B 5 "YourDriveBrand"
# The fix
sudo modprobe uas
echo 'vendor_id product_id' | sudo tee /sys/bus/usb/drivers/uas/new_id
sudo usbreset vendor_id:product_id
# Check it worked
lsblk
If you’re using an AMD Ryzen processor like the Ryzen 7 4800H on Ubuntu ( which i currently have on my personal laptop ), you might have experienced severe CPU throttling after resuming from suspend mode. This issue is particularly noticeable during CPU-intensive tasks when the processor is stuck at a much lower frequency, typically around 1.4 GHz, even though it is capable of reaching up to 4.3 GHz.
Most users are not even aware of this throttling issue because they are not actively monitoring the CPU frequency. If you are experiencing severe lag, poor responsiveness, and overall slowness after resuming from suspend, these symptoms are the result of your CPU being locked to a lower frequency, which dramatically impacts the performance of course.
This solution should work on other related AMD Ryzen processors as well, including models from the Ryzen 4000, 5000, and even 7000 series. The root cause is linked to ACPI (Advanced Configuration and Power Interface) limitations imposed after suspend, which restrict the processor’s max frequency.
Diagnosing the Problem
First, let’s confirm the issue by running the following commands:
# Check CPU model
lscpu | grep 'Model name'
# Check current CPU frequencies
cat /proc/cpuinfo | grep 'cpu MHz'
# Check CPU governor status
cat /sys/devices/system/cpu/cpu*/cpufreq/scaling_governor | sort | uniq
If you notice the frequencies are stuck below the max potential, the next step is to verify the imposed limits:
# Max frequency limit
cat /sys/devices/system/cpu/cpu0/cpufreq/scaling_max_freq
# Hardware max frequency
cat /sys/devices/system/cpu/cpu0/cpufreq/cpuinfo_max_freq
# BIOS imposed limit
cat /sys/devices/system/cpu/cpu0/cpufreq/bios_limit
If your BIOS limit is lower than the hardware max frequency, you are experiencing ACPI throttling.
Implementing the Fix
To resolve this, follow the steps below:
Step 1: Create a Fix Script
Create a shell script to override the BIOS limitations:
#!/bin/bash
# Fix CPU frequency scaling after suspend
# Get the maximum hardware frequency
MAX_FREQ=$(cat /sys/devices/system/cpu/cpu0/cpufreq/cpuinfo_max_freq)
# Override BIOS limit if it exists
if [ -f /sys/devices/system/cpu/cpu0/cpufreq/bios_limit ]; then
echo "BIOS limit detected, attempting to override..."
echo $MAX_FREQ | sudo tee /sys/devices/system/cpu/cpu0/cpufreq/bios_limit > /dev/null || true
fi
# Set maximum frequency for all CPUs
for cpu in /sys/devices/system/cpu/cpu*/cpufreq/scaling_max_freq; do
echo $MAX_FREQ | sudo tee $cpu > /dev/null
done
# Set performance governor for better scaling
for cpu in /sys/devices/system/cpu/cpu*/cpufreq/scaling_governor; do
echo performance | sudo tee $cpu > /dev/null
done
echo "CPU frequency scaling fixed. Max frequency set to $MAX_FREQ Hz with performance governor."
Make the script executable:
chmod +x ~/cpu_frequency_fix.sh
Step 2: Automate the Fix with Systemd
To make the fix persistent after every suspend cycle, create a systemd service:
After applying these steps, your AMD Ryzen CPU should scale correctly even after suspend, unlocking its full performance potential. This solution not only optimizes your Ubuntu experience but also ensures that your processor’s capabilities are fully utilized.
This method has been tested successfully on Ubuntu 25.04 with ASUS TUF Gaming A17 but should work with other AMD-powered systems as well.
How to Make the TP-Link Archer TX50Uh AX3000 USB WiFi Adapter Work on Ubuntu?
If you recently bought the TP-Link Archer TX50Uh AX3000 Wireless USB Adapter from Amazon India and discovered it doesn’t work out of the box on Ubuntu Linux, you’re not alone.
Here’s how I got it working smoothly on my Ubuntu system. ( Tested on the Newest Ubuntu 25.04 -when writing )
Amazon Product package: Tp-Link Archer Tx50Uh Ax3000 High Gain Wireless USB Adapter | 3000 Mbps Dual Band WiFi 6 | High Gain Antennas and Beamforming | USB 3.0 | Wpa3 | Ofdma and Mu-Mimo – Black
This device in lsusb shows up as ID 35bc:0101 Realtek 802.11ax WLAN Adapter.
It’s quite easy to make it work on Ubuntu. Here are the steps.
Thanks to morrownr for maintaining a reliable driver repo for this chipset.
git clone https://github.com/morrownr/rtl8852cu-20240510
cd rtl8852cu-20240510
3. Build and Install the Driver
make
sudo make install
4. Configure the Module
During installation, a config file will open in nano. Find this line:
options 8852cu rtw_switch_usb_mode=0
Change it to:
options 8852cu rtw_switch_usb_mode=1
Save and exit (Ctrl+O, Enter, Ctrl+X).
To edit this config later, you can find it at:
sudo nano /etc/modprobe.d/8852cu.conf or use Vi or gedit
5. Reboot and Connect
Now reboot your system:
sudo reboot
After rebooting, your TP-Link WiFi adapter should be detected. The LED should start blinking, and you should see WiFi networks available in your settings.
When working with external monitors on Ubuntu, adjusting the brightness of the external monitor connected to your laptop can often be a challenge, especially when traditional methods fail or when you’re working with specific hardware like NVIDIA GPUs or USB-C to HDMI adapters. Many users struggle with issues such as brightness settings not being adjustable or xrandr and ddcutil commands failing, even when everything seems to be set up correctly.
After installing the latest Ubuntu 25.04 Plucky Puffin, I found myself in a similar situation where my external monitor’s brightness was already at its lowest, yet it was still too bright for many users, leading to frustration. In this guide, we will explore multiple ways to adjust the brightness of your external monitor on just-launched Ubuntu 25.04 and add a special focus on the Xorg solution—an option that could save the day when everything else fails.
( Skip to Method 3 if you want a simple solution – Also check that Bonus Github Script )
Method 1: Using xrandr (Basic Brightness Control)
One of the most common methods to adjust brightness on Ubuntu is through xrandr, which allows users to manipulate various display properties directly from the terminal. For external monitors, you can try the following:
xrandr --output HDMI-A-0 --brightness 0.7
However, xrandr’s--brightness option has limited effectiveness, especially for certain monitors and drivers. It doesn’t directly change the hardware brightness but simulates brightness by adjusting the display’s gamma, which may not always work as expected.
It also usually doesn’t work these days on Ubuntu Wayland versions.
Method 2: Using ddcutil (DDC/CI Communication)
If you need to adjust hardware brightness (as in the actual brightness level controlled by the monitor), ddcutil is a great tool, provided your monitor supports DDC/CI (Display Data Channel/Command Interface). You can install it using the following command:
sudo apt install ddcutil
Once installed, you can attempt to adjust the brightness using ddcutil:
ddcutil setvcp 0x10 50
Unfortunately, this method doesn’t always work due to compatibility issues between the software, the monitor, and the connection type (such as USB-C to HDMI). You might encounter errors like:
DDCRC_READ_ALL_ZERO
Method 3: Switching to Xorg (A Potential Solution)
If traditional methods like xrandr and ddcutil fail, switching to Xorg could be a game-changer. By default, many modern Ubuntu systems use Wayland as the display server. However, Xorg might offer better compatibility with certain monitors, especially when it comes to adjusting external monitor brightness.
Why Switch to Xorg?
Better compatibility with legacy hardware and drivers.
Improved handling of external monitors and DDC/CI.
If your external monitor is not behaving as expected under Wayland, switching to Xorg can help address issues related to brightness control.
How to Switch to Xorg ( Recommended APproach )
Switching to Xorg on Ubuntu is simple. Follow these steps:
Log Out from your current session.
On the login screen, click on the gear icon (⚙️) down in the bottom right corner and select Ubuntu on Xorg.
Log back in.
Alternatively, if you want to make Xorg the default display server:
Edit the GDM configuration file: sudo nano /etc/gdm3/custom.conf
Uncomment (remove the #) the line that says WaylandEnable=false.
Save and exit the file, then reboot your system: sudo reboot
After switching to Xorg, you should see improved compatibility with xrandr, ddcutil, and other display tools, particularly for external monitors.
What Worked After Switching to Xorg
After switching to Xorg, I found that the xrandr command worked properly, but I had to first determine the correct monitor identifier. I used the following command to list all connected monitors:
xrandr | grep connected
This showed me the monitor I needed to target. Once I had the correct output identifier, I was able to adjust the brightness successfully:
xrandr --output HDMI-A-0 --brightness 0.7
Additionally, I found that xgamma could be used to adjust the gamma of the display. This is useful for fine-tuning the color and brightness in a different way, though it’s more of a gamma correction tool rather than a direct brightness control. To adjust the gamma, you can use the following command:
xgamma -display :0 -gamma 0.5
This command adjusts the gamma to 0.5, effectively darkening the screen (or brightening, depending on the value). While it doesn’t directly control the monitor’s brightness, it’s a good option for tweaking the overall appearance.
Persisting xrandr and xgamma Settings Across Reboots
Unfortunately, both xrandr and xgamma settings are temporary and will not survive a reboot or logout by default. When you log out or reboot, the display settings are reset, and you’ll need to reapply them after logging in again.
Workaround for Persistence:
To make these settings persist across reboots or logouts, you can create a startup script to automatically apply the settings when you log in. Here’s how you can do it:
Open a terminal and create a new script file: vi ~/set_display_brightness.sh
Add the xrandr and/or xgamma commands to this script. For example: #!/bin/bash xrandr --output HDMI-A-0 --brightness 0.7 You have to find your monitor name by running the command xrandr | grep connected ( For me, it’s HDMI-A-0 ) – WARNING – Don’t use 0 as the brightness value – your screen will go Black.
Save the file and close the editor.
Make the script executable: chmod +x ~/set_display_brightness.sh
Set the Script to Run on Startup
You can configure Ubuntu to run this script automatically when you log in:
Press Alt + F2, type gnome-session-properties, and press Enter to open the Startup Applications Preferences.
In the Startup Applications Preferences, click Add to add a new startup program.
In the Name field, enter something descriptive, such as Set Display Brightness.
In the Command field, enter the full path to the script, like: /home/yourusername/set_display_brightness.sh
Click Add, then Close.
Now, each time you log in, the script will run automatically and set your brightness settings to your preferences.
BONUS: A Bash Script to Create a System Tray Icon to Adjust Brightness ( for Ubuntu on Xorg only ) – Github link.