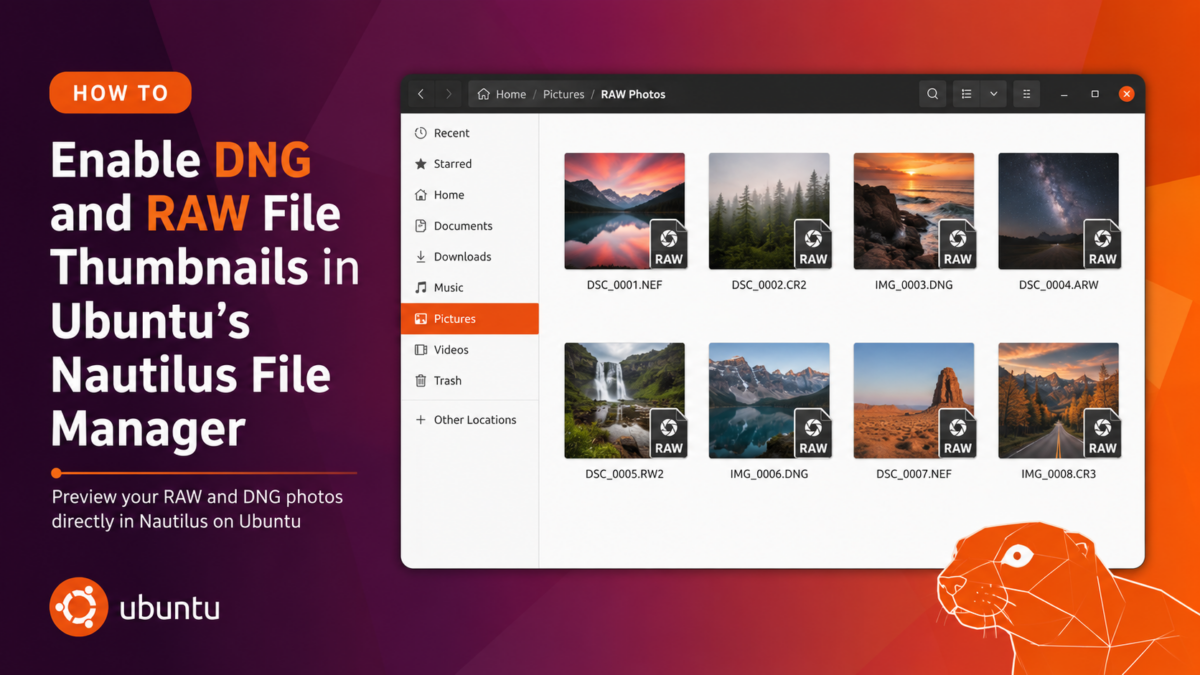
How to Enable DNG and RAW File Thumbnails in Ubuntu’s Nautilus File Manager

Ubuntu’s Nautilus file manager doesn’t show thumbnails for DNG, CR2, NEF, ARW, or other RAW camera formats out of the box. This guide covers the exact steps to fix that using dcraw and a custom thumbnailer registration.

Why RAW Thumbnails Don’t Work on Ubuntu

The package most guides point to — libopenrawgnome — only installs a shared library. It ships with no .thumbnailer registration file, so Nautilus never learns it can handle RAW formats. The thumbnailer sits unused, and your DNG files show a generic icon no matter how long you wait.

The fix involves three things: a tool that can extract embedded previews from RAW files (dcraw), a small wrapper script that feeds those previews to ImageMagick for resizing, and a .thumbnailer file that tells Nautilus the script exists.

Step 1 — Install the Required Packages

sudo apt install libopenrawgnome7t64 -y

dcraw is available on most Ubuntu installs already. Check with:

which dcraw

If it’s missing, install it:

sudo apt install dcraw -y

ImageMagick (convert) is also needed. Verify:

which convert

Install if absent:

sudo apt install imagemagick -y

Step 2 — Create the Thumbnailer Script

Create the file /usr/local/bin/raw-thumbnailer:

sudo nano /usr/local/bin/raw-thumbnailer

Paste in:

#!/bin/bash
dcraw -e -c "$1" 2>/dev/null | convert - -thumbnail "$3x$3" "$2" 2>/dev/null

Save and make it executable:

sudo chmod +x /usr/local/bin/raw-thumbnailer

This script takes three arguments — input file path, output PNG path, and size — which is exactly the interface Nautilus passes to any registered thumbnailer. dcraw -e -c extracts the embedded JPEG preview that most RAW files carry internally, and convert resizes it to the requested thumbnail dimensions.

Step 3 — Register the Thumbnailer with Nautilus

Create /usr/share/thumbnailers/raw.thumbnailer:

sudo nano /usr/share/thumbnailers/raw.thumbnailer

Paste in:

[Thumbnailer Entry]
TryExec=/usr/local/bin/raw-thumbnailer
Exec=/usr/local/bin/raw-thumbnailer %i %o %s
MimeType=image/x-dcraw;image/x-adobe-dng;image/x-canon-cr2;image/x-canon-crw;image/x-nikon-nef;image/x-sony-arw;image/x-fuji-raf;image/x-panasonic-raw;image/x-olympus-orf;image/x-pentax-pef;image/x-sigma-x3f;

This covers DNG (Adobe), CR2/CRW (Canon), NEF (Nikon), ARW (Sony), RAF (Fujifilm), ORF (Olympus), PEF (Pentax), and Panasonic RAW formats in one file.

Step 4 — Clear the Thumbnail Cache and Restart Nautilus

Nautilus caches thumbnail failures. Clear the cache so it retries every file:

rm -rf ~/.cache/thumbnails/

Restart Nautilus:

nautilus -q && nautilus &

Navigate to a folder with DNG or RAW files — thumbnails should start generating within a few seconds.

How It Works

ComponentRole
dcraw -e -cExtracts the embedded JPEG preview from the RAW file
convert (ImageMagick)Resizes the extracted preview to the requested thumbnail size
/usr/share/thumbnailers/raw.thumbnailerTells Nautilus which MIME types this script handles
TryExecNautilus checks this path exists before calling the thumbnailer

Most RAW files contain a full-resolution embedded JPEG shot by the camera. dcraw pulls that out directly, so thumbnail generation is fast — no full RAW decode required.

Supported Formats After This Fix

  • DNG — Adobe Digital Negative (used by Google Pixel, OnePlus, Lightroom exports)
  • CR2 / CRW — Canon RAW
  • NEF — Nikon RAW
  • ARW — Sony RAW
  • RAF — Fujifilm RAW
  • ORF — Olympus RAW
  • PEF — Pentax RAW
  • Panasonic RAW (RW2)

Troubleshooting

Thumbnails still not showing after restart

Run the script manually on one of your files to confirm it works:

/usr/local/bin/raw-thumbnailer "/path/to/your/file.dng" /tmp/test_thumb.png 256
file /tmp/test_thumb.png

The output should read something like PNG image data, 256 x 192, 8-bit/color RGB. If it does, the toolchain works and Nautilus will pick it up on the next browse.

dcraw: no embedded JPEG error

Some RAW files — particularly very old formats or losslessly-compressed DNGs — don’t carry an embedded preview. For those, dcraw falls back to a full decode. The thumbnail will still generate but may be slower.

Permission denied on /usr/share/thumbnailers/

The sudo in Step 3 is required. If you used a text editor that launched without sudo, recreate the file with:

sudo tee /usr/share/thumbnailers/raw.thumbnailer << 'EOF'
[Thumbnailer Entry]
TryExec=/usr/local/bin/raw-thumbnailer
Exec=/usr/local/bin/raw-thumbnailer %i %o %s
MimeType=image/x-dcraw;image/x-adobe-dng;image/x-canon-cr2;image/x-canon-crw;image/x-nikon-nef;image/x-sony-arw;image/x-fuji-raf;image/x-panasonic-raw;image/x-olympus-orf;image/x-pentax-pef;image/x-sigma-x3f;
EOF

FAQ / Common Questions

Why doesn’t Ubuntu show RAW thumbnails by default?
The libopenrawgnome package that ships in Ubuntu’s repositories installs only a shared library — it doesn’t include a .thumbnailer registration file. Without that file, Nautilus has no way to know the library supports RAW formats.

Does this work on Ubuntu 22.04, 24.04, and 24.10?
Yes. The .thumbnailer file format and dcraw are available across all current Ubuntu LTS and interim releases. The package name for the GNOME integration library differs slightly (libopenrawgnome7t64 on 24.04+, libopenrawgnome7 on 22.04), but the thumbnailer script and registration steps are identical.

Will this slow down Nautilus when browsing large RAW folders?
Thumbnail generation runs in the background. Nautilus queues files and processes them one at a time — browsing stays responsive. Generated thumbnails are cached in ~/.cache/thumbnails/, so each file is only processed once.

Does this work with DNG files from smartphones like Google Pixel and OnePlus?
Yes. DNG is the format used by Google Pixel, OnePlus, and many third-party camera apps. dcraw handles DNG files from both dedicated cameras and smartphones.

What if I want thumbnails in a KDE file manager like Dolphin instead?
Install kdegraphics-thumbnailers — it includes native RAW support for Dolphin and other KDE applications.


Note: Steps above were tested on Ubuntu 24.04 with Nautilus 46 and dcraw 9.28. Package names and exact paths may vary slightly on other Ubuntu versions. Verify commands before running on production systems.

Disclaimer: This post is for informational purposes. Commands involving sudo modify system files — review each step before executing.

[ FIX] Seagate 5TB External Drive Vanishes in Ubuntu Linux, but works on Windows 11 Home

My 5TB Seagate external drive—the one with literally years of backups— all of a sudden decided to play hide and seek with Ubuntu Linux. Windows? No problem, worked like a charm. Ubuntu? Complete radio silence.

If you’re reading this, you’re probably in the same boat. Good news: I cracked it, and it’s actually a pretty interesting problem once you dig into it.

What Went Wrong

Picture this: You plug in your external drive, hear that satisfying USB connection sound, but then… nothing. No pop-up, no drive in the file manager, nada. That was me last Sunday.

The weird part? The drive was perfectly fine. Windows could read it, write to it, everything. But Ubuntu Linux acted like it didn’t exist. Classic Linux moment, right? Wrong. Turns out, there’s actual logic behind this madness.

Let’s Get Our Hands Dirty

The first thing I did was fire up the terminal. Yeah, I know, GUI would be nice, but sometimes you gotta go old school. Here’s how the investigation went down:

Round 1: Where’s My Drive?

lsblk -f

Ran this bad boy expecting to see my drive. Got everything BUT my external drive. Internal NVMe? Check. Every snap loop known to mankind? Check. My 5TB lifesaver? MIA.

Round 2: Okay, But Is It Even Connected?

lsusb

Boom! There it was:

Bus 004 Device 002: ID 0bc2:ab8c Seagate RSS LLC One Touch w/PW

So Ubuntu could SEE the drive, it just didn’t know what to do with it. Like when you meet someone at a party and forget their name immediately—awkward, but fixable.

Round 3: What’s the Kernel Saying?

sudo dmesg | grep -i "seagate"

Kernel was like “Yeah, I see it, but ¯_(ツ)_/¯”. No errors, no warnings, just… nothing. That’s when I knew something deeper was going on.

The “Aha!” Moment

This is where things got interesting. I decided to dig deeper into the USB device info:

sudo usb-devices | grep -A 5 -B 5 "Seagate"

And there it was, staring me in the face:

I:  If#= 0 Alt= 0 #EPs= 2 Cls=08(stor.) Sub=06 Prot=50 Driver=(none)

See that Driver=(none) part? That’s the problem right there. Ubuntu knew it was a storage device, but had absolutely no clue which driver to use. It’s like having a Ferrari but no keys.

Why This Drama?

Here’s the thing most people don’t know: modern big-boy drives (we’re talking 4TB+ territory) don’t use the old USB storage protocol anymore. They’ve moved on to something called UAS—USB Attached SCSI.

Think of it this way:

  • Old USB storage = Taking the stairs one at a time
  • UAS = Taking the elevator

UAS is faster, smarter, and doesn’t hog your CPU like the old protocol. But here’s the kicker—Ubuntu doesn’t always load the UAS driver automatically. Why? Who knows. Linux gonna Linux.

The Fix That Actually Works

Alright, enough theory. Here’s how I got my drive back from the dead:

Step 1: Wake Up the UAS Driver

sudo modprobe uas

This basically tells Ubuntu, “Hey, remember that fancy USB driver you forgot about? Yeah, load it up.”

Step 2: Introduce Your Drive to the Driver

echo '0bc2 ab8c' | sudo tee /sys/bus/usb/drivers/uas/new_id

Translation: “Dear UAS driver, meet Seagate. Seagate, meet UAS. You two are going to be best friends.”

Step 3: Give the USB a Little Kick

sudo usbreset 0bc2:ab8c

Sometimes you just need to turn it off and on again. But fancy-like, through the terminal.

Step 4: Did It Work?

lsblk -f | grep -v loop

And just like that, my drive showed up at /media/mac/One Touch. Magic? Nope. Just Linux being Linux.

But Why Does This Even Happen?

Look, I’ve been using Linux for years, and stuff like this still catches me off guard. Here’s the deal:

It’s not a bug, it’s a… well, okay, it’s kind of a bug. But also:

  • Drive manufacturers don’t always follow standards
  • Linux plays it safe—if it’s not sure, it won’t load a driver
  • Windows has deals with manufacturers; Linux developers reverse-engineer everything
  • Your specific drive model might be too new or too weird for the default config

Make This Fix Stick (So You Don’t Have to Do This Again)

I’m lazy. I don’t want to run these commands every time I plug in my drive. Here’s how to make Ubuntu remember:

sudo nano /etc/udev/rules.d/99-seagate-uas.rules

Paste this line (yeah, it’s long and ugly, but it works):

ACTION=="add", ATTRS{idVendor}=="0bc2", ATTRS{idProduct}=="ab8c", RUN+="/sbin/modprobe uas", RUN+="/bin/sh -c 'echo 0bc2 ab8c > /sys/bus/usb/drivers/uas/new_id'"

Then reload the rules:

sudo udevadm control --reload-rules

Done. Your drive will now work every time you plug it in. You’re welcome.

Pro Tips from Someone Who’s Been There

After spending way too many late nights fighting with external drives, here’s what I’ve learned:

The USB Port Matters
Not all USB ports are created equal. That blue USB 3.0 port? Use it. The ancient USB 2.0 on the side? That’s for your mouse. Big drives need big bandwidth.

Cable Quality Is Real
That sketchy cable you got for ₹50 / $5 at the station? Yeah, throw it away. Get a decent cable. Your data deserves better.

Format Wars Are Stupid (But Real)

  • exFAT: The Switzerland of file systems. Works everywhere, handles big files
  • NTFS: Windows’ favorite child. Linux can read it, but you might need ntfs-3g
  • ext4: Linux native. Windows will pretend it doesn’t exist

When All Else Fails
Sometimes the drive is just having a bad day. Try:

  • Different USB port (seriously, this fixes 30% of problems)
  • Different cable (another 20%)
  • Restart (yes, even on Linux)
  • Different computer (to check if it’s the drive or your system)

The Quick and Dirty Checklist

Having issues? Run through this:

  1. Can you see it?lsusb
  2. Is there a driver?sudo usb-devices | grep Driver
  3. Load UASsudo modprobe uas
  4. Tell UAS about your driveecho 'vendor_id product_id' | sudo tee /sys/bus/usb/drivers/uas/new_id
  5. Reset USBsudo usbreset vendor_id:product_id
  6. Check againlsblk

If that doesn’t work, the problem is probably:

  • Dead drive (RIP) – My backup of the backup – a 4TB is in this state. I can hear the drive spinning up and then .. it just dies.
  • Dead cable (easy fix)
  • Dead USB port (try another)
  • Filesystem corruption (time for fsck)

What I Learned

This whole adventure taught me something: Linux isn’t trying to be difficult. It’s just really, really careful. Windows will load any driver and hope for the best. Linux wants to be absolutely sure before it touches your hardware.

Is it annoying? Sure. But it’s also why Linux servers run for years without crashing. It’s the price we pay for stability.

Plus, once you fix it, you feel like a wizard. And that’s worth something.

Your Turn

Got a similar story? Fixed it differently? Think I’m doing it wrong? Drop a comment. The best part about the Linux community is we all learn from each other’s pain… I mean, experiences.

And hey, if this saved your bacon, share it. There’s someone out there right now, at 2 AM, googling “external drive not showing ubuntu help please god why” who needs this.

The Commands You’ll Actually Use

Save this somewhere. You’ll need it again:

# See what's connected
lsusb

# Get details
sudo usb-devices | grep -A 5 -B 5 "YourDriveBrand"

# The fix
sudo modprobe uas
echo 'vendor_id product_id' | sudo tee /sys/bus/usb/drivers/uas/new_id
sudo usbreset vendor_id:product_id

# Check it worked
lsblk

That’s it. No fluff, no BS, just what works.


Tags: #Linux #Ubuntu #ExternalDrive #RealWorldFix #TechStories #LinuxLife #StorageSolutions #TechSupport #SeagateFix #UbuntuTips

Exit mobile version